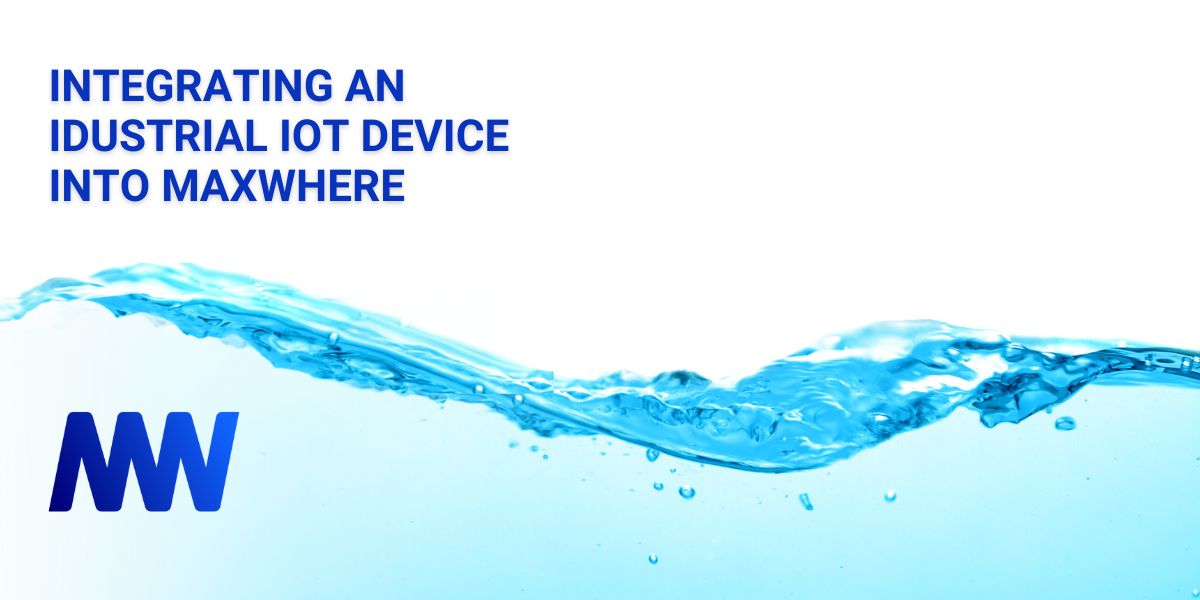
During a MAXWHERE demo, a potential customer asked me how complicated integrating an Industrial IoT device into a MAXWHERE digital twin is. I frankly answered that it could not be more than half an hour from scratch. He smiled widely….
I knew the truth about that because recently, we have integrated a whole bunch of P+F IO-Link sensors through MQTT, so I was pretty confident. To present a double proof, last weekend, I made a quick sprint on my kitchen table and put together a perfect justification: I modeled the IoT monitoring system to my rainwater collector tank using a $20 kit.
Let's see the details…
The setup should represent the easiest way of implementing the monitoring. The goal is clear: sampling the water level with some electronics and sending the measurements to a messaging server on an interval basis. In the monitoring app, we then subscribe to the measurements and handle the visualization as we need it.
Regarding the messaging, the way to go (at least for our purpose) is MQTT. This is the quickest possible and lightweight enough IoT messaging platform that can serve a vast majority of use cases even in industrial environment.

For my home projects, I usually use the products of M5 Stack. This company is a rising star from China with supercool components to build almost anything. Since I order M5 Stack stuff regularly, picking all the necessary components from my inventory was easy.
The core of the edge system is an M5 Stack Atom Matrix. A simpler Atom would make it, but I had a Matrix at hand. M5 Atom Matrix is a tiny dev unit with a powerful ESP32 chip with everything I need internally (https://shop.m5stack.com/products/atom-matrix-esp32-development-kit). It can be programmed in multiple environments, such as Platform.IO, Arduino, and MicroPython, but I wanted to use only no-code approaches as much as possible this time, so I used the UIFlow block programming environment.

The easiest way to measure the tank's water level is to use an ultrasonic distance sensor. M5 Stack offers a nice little module (https://shop.m5stack.com/products/ultrasonic-distance-unit-i2c-rcwl-9620) with an I2C interface that can be directly connected to the Atom through a Grove cable (https://wiki.seeedstudio.com/Grove_System).

These are all the hardware we need, at least for a test rig. To make it suitable for the real world, I will put it into a sealed box to protect the stuff from the water. In this post, I just omit such details, but anyone can imagine a 3D-printed case filled with electronics and some silicone.
As a quick sprint, I selected the easiest way to make everything up and running without writing code or typing in the console. According to the architectural design, we have three parts: The embedded software, the communication channel, and the PC side software. In this section, I go through the realization of these three components.
Installing a local Mosquitto server would also be fine, but if you want global access (e.g., to check your water level from the Bahamas), you need a hosted MQTT server. Luckily, some out-of-the-box service providers exist, like HiveMQ, with which we can pull up a globally accessible MQTT backend in a minute free of charge for small projects.

After signing in, we immediately have an instance ready to use. The host URL, port, and user credentials should be copypasted to the MQTT clients, and everything is ready to go!

The microcontroller program is created using the block-based development environment of M5 Stack called UI-Flow (https://flow.m5stack.com/). This web application enables hobbyists and kids to quickly drop a few blocks together to get something to work. Under the hood, it utilizes a static code generator that translates the blocks into python code which can run on the device thanks to the MicroPython runtime (https://micropython.org/) available on the ESP32 platform.
To learn more about bootstrapping a UIFlow dev environment for your M5Stack device, visit this page: https://docs.m5stack.com/en/quick_start/atom/uiflow
And now, take a look at our actual program! Simple enough, isn't it? We could go didactically block by block, but the figure is self-explaining. The only place when some lines of code were unavoidable was the MQTT client's creation. Due to some HiveMQ specifics related to SSL, the simple MQTT config block did not make it.

At MAXWHERE, we continuously work on making digital-twin prototyping as easy as possible. Therefore, the Virtual Operations Center Builder (VoC) was created to give a simple tool to connect MAXWHERE to the outer world. It is built around the Node-Red no-code development tool that offers a wide variety of nodes to make data flows and implement filter/modifier logic between data sources and sinks.
A set of MAXWHERE-specific nodes allow the developer to create and access the objects of the space and manipulate them according to the user input events and inputs from the outer world. The MQTT subscriber and publisher nodes are among the most potent elements in the node-red basic palette.
Since the node-red flow is yet simple, it is not as trivial as the UIFlow stuff we go through the flow, node by node.

One unique benefit of the MAXWHERE space is that the 3D digital twin can be extended with any web content via the so-called MAXWHERE projects. Here, I included some online rainfall statistics and historical data sources.

Testing of the model also took place on my dining table. My wife was so kind to provide the test rig in the form of some fought-down plasticware. The fixture that keeps the ultrasonic sensor in place is improvised from my son's LEGO kit. Let's see how it works:
I hope the reader gets an insight into how sensor integrations work in a MAXWHERE digital-twin project. It goes pretty much the same way using industrial-grade devices and IoT backend technologies: Quick and easy.
In complex, industrial digital-twin projects, we usually perform the MAXWHERE-side development in TypeScript using the MAXWHERE APIs. The lower-level development approach allows for implementing any custom logic and even lets us override the standard MAXWHERE UI. This way, a whole industry-specific virtual operation center can be developed with a considerably small team and agile timeframe. In another blog post, we introduce an Intermodal Logistics Terminal Management application which is an illustrative example of how far we can go with the MAXWHERE digital-twin solutions.

A digitális vagy IKT-kompetenciák fejlesztése az Európai Unió kiemelt stratégiai célja, hiszen a korszerű eszközökhöz értő felnőttek könnyebben boldogulnak a munkaerőpiacon, ami hosszú távon a régiók fejlesztésével is szorosan összefügg. Számos nemzetközi projekt segíti a közoktatást a diákok alapszintű és szakmai digitális tudásának fejlesztésében. A közoktatási intézményekből ma már a legtöbb esetben nem hiányoznak a számítógépek, tabletek. Főként a pandémia óta még a hátrányos helyzetű térségekbe is eljutottak (még ha nem feltétlenül elegendő számban is) tabletek, okostelefonok, laptopok. Az ezeken megvalósítható élményszerű oktatás kulcsfontosságú eszköze a készségfejlesztésnek. A cselekvéses tanulás (learning by doing) elmélete szerint a diáknak a gyakorlatban kell megtapasztalnia egy adott tudáselem működését, hogy tartós ismeretbővülés és készségfejlődés következzen be. Ha azonban az adott dolog nem (vagy csak nehezen) elérhető, szimulációs megoldások állnak rendelkezésre. Ilyen szimulációt kínál a MaxWhere a 3D Printing Workshop terével, amely bárki számára hozzáférhető, ráadásul böngészőből is elérhető.
A MaxWhere alapítói és fejlesztői között számos egyetemi oktatót, oktatástechnológiai szakembert találunk. Így egyértelmű, hogy a társadalmi felelősségvállalás részeként a MaxWhere csapata elkötelezett az oktatási alkalmazások fejlesztése mellett. Így csatlakoztunk a Tallinni Egyetem és a linzi Johannes Kepler Egyetem felkérésére az ún. STEAM Upgrade projekthez, amelynek egyik fókusza a 3D nyomtatás mint tartalom kidolgozása a STEAM (Science, Technology, Arts and Mathematics) képzésekben. A munkacsoport tagja még a Craftbot, közismert 3D nyomtatók gyártója is.
A STEAM Upgrade projekt célja egy digitális kompetenciafejlesztési rendszer létrehozása a STEAM tantárgyak tanulásához az alap- és középfokú oktatás körében, amelynek része egy szabadon hozzáférhető tudásbázis és egy virtuális STEAM laboratórium is.
Ennek jegyében a linzi egyetem arra kérte fel a MaxWhere csapatát, hogy egy interaktív virtuális térben mutassuk be a 3D nyomtatás folyamatát, és szimuláljuk egy 3D nyomtató működését. A MaxWhere 3D Printing Workshop térben szimulált nyomtató egy Creality Ender 3, a világ egyik legjelentősebb 3D-nyomtatógyártója által fejlesztett berendezés üzemelését mintázza, de az azonos működési elv miatt az itt megszerzett tudás bármely más nyomtatónál is alkalmazható.
Ez a MaxWhere-tér böngészőből elérhető, így a MaxWhere kliens telepítése sem szükséges hozzá. Felhasználói fiók sem szükséges, betöltés után egyből a térben találjuk magunkat. Ezt a teret bárki különösebb előképzettség nélkül megnyithatja, és csupán a MaxWhere használatának alapszintű ismerete (navigáció, smartboardok használata) szükséges hozzá.
A térbe belépve egyrészt smartboardokat látunk. Ezeken a 3D nyomtatás legfontosabb alapismereteit láthatjuk: a 3D nyomtatás történetétől a mai nyomtatók működési elveiig. A tér középpontjában pedig egy Creality Ender 3 nyomtató virtuális ikerpárja található egy egyszerű kezelőpanellel. Azért ezt a modellt választottuk, mert ez gyakori, népszerű és hozzáférhető, így aki a későbbiekben “tényleges” 3D nyomtatóval dolgozna, annak az eszköz már ismerős lesz.
A tér sikeres betöltése után a következő lépésekkel kezdhetjük meg a nyomtatást:
A tér teljes mértékben testre szabható. Egyrészt a szerkesztési jogosultsággal rendelkező felhasználók módosíthatják a smartboardok tartalmát, másrészt a 3D nyomtató működése is szemléltethető bármilyen gcode fájl importálásával, amely az Ender 3 nyomtatóhoz készült.

A linzi Johannes Kepler Egyetem oktatásmódszertani doktori iskolájában évente százak tanulnak a világ minden tájáról. Ezen kívül számos workshopot, konferenciát rendeznek. Így a doktoranduszok széles körében válhat ismertté a MaxWhere részvételével zajló projekt, aminek közvetett hatása lehet még, hogy ösztönözheti számos más élményalapú tanulási, szimulációs projekt létrejöttét. Az oktatásban a virtualizációs megoldások szerepe egyébként egyre nő, így különösen fontos, hogy ezeket tudományos megalapozottsággal fejlesszék, majd szakértők validálják.
A tér egyszerre szolgál közoktatási és ismeretterjesztő célokat. Egy “igazi” 3D nyomtató üzemeltetése, karbantartása és esetleges javítása magas költséggel, sok idő ráfordításával járhat, és olyan ismeretanyag kell hozzá, amivel egy általános képzettségű tanító vagy tanár nem feltétlenül rendelkezik. Egy belépő szintű 3D nyomtató ára, valamint a működtetéshez szükséges anyagok költsége a legtöbb iskola számára túl magas lenne, amihez hozzáadódik, hogy a nyomtató üzemeltetéséhez szükséges szaktudás nem áll minden intézményben rendelkezésre.
A MaxWhere 3D Printing Workshop teret bárki megnyithatja, majd beviheti a tanórájára, és megismertetheti a diákokkal a 3D nyomtatás eljárását. A virtuálisan kinyomtatott tárgyaknak köszönhetően így a tanulás élményszerű és szórakoztató lesz. Az oktatótér a fejlesztés végeztével publikussá tehető, így bárki használhatja.
A tanulás nem ér véget az objektum kinyomtatásánál: a diákok akár saját maguk is elkészíthetik a kinyomtatandó geometriát, így az egész folyamat az ő kezük alatt bontakozik ki. Érdekes és ingyenes szoftverekkel, mint a Tinkercad és a Kiri:Moto, rövid idő alatt elvégezhető feladat egy kézzel rajzolt 2D kontúr 3D testé alakítása, majd a slice-olás és a nyomtatás elindítása.
A 3D printing szimulációs tér létrehozása magával hozott olyan fejlesztéseket, amelyek a Maxwhere alapképességeit is tovább bővítették. A technológia szimulálása során felmerült kihívások így jóval szélesebb körű fejlődést jelentenek a MaxWhere számára. Lehetségessé vált “valós időben” megjeleníteni a nyomtatás során a filamentből kialakuló háromdimenziós tárgyakat. Ilyen megjelenítési képességre szükség van más additív technológiák vizualizációjában is, de az anyageltávolítás is hasonló módon modellezhető.
Tutorial: https://docs.maxwhere.com/usersguide/index.html
Gcode fájlok:
https://mw-public-downloads.s3.eu-west-1.amazonaws.com/3D-printing-resources/mw-logo.gcode
https://mw-public-downloads.s3.eu-west-1.amazonaws.com/3D-printing-resources/steamupgrade-logo.gcode
The development of digital or ICT competencies is a critical strategic goal of the European Union since adults who know how to use modern tools can more easily succeed in the labour market, which is closely related to the region's long-term development. Several international projects help public education develop students' primary and professional digital skills. Nowadays, in most cases, public education institutions have computers and tablets. Especially since the pandemic, tablets, smartphones, and laptops have reached disadvantaged areas (even if not necessarily in sufficient numbers). The experiential education that can be implemented on these devices is a crucial tool for skill development. According to the theory of learning by doing, the student must experience a specific knowledge element in practice to achieve permanent knowledge expansion and skill development. However, if these tools are difficult to reach or implement in educational institutions, simulation solutions are available. MaxWhere offers a simulation with the space of a 3D Printing Workshop, making it accessible to anyone and can also be opened from a browser.
Among the founders and developers of MaxWhere are many university lecturers and educational technology specialists. Thus, as part of social responsibility, the MaxWhere team is committed to developing educational applications. In this spirit, we joined the so-called STEAM Upgrade project at the request of Tallinn University and the Johannes Kepler University of Linz. One of the focuses of STEAM Upgrade project is the development of 3D printing as content in STAM (Science, Technology, Arts and Mathematics) courses. Craftbot, a well-known manufacturer of 3D printers, is also a member of the working group.
The STEAM Upgrade project aims to create a digital competence development system for learning STEAM subjects in primary and secondary education, including a freely accessible knowledge base and a virtual STEAM laboratory.
Thus, the University of Linz asked the MaxWhere team to present the 3D printing process in an interactive virtual space and simulate the operation of a 3D printer. The printer simulated in MaxWhere 3D Printing Workshop models the operation of a Creality Ender 3, a device developed by one of the world's most important 3D printer manufacturers. However, the knowledge gained here can also be applied to any other printer due to the same working principle.
This MaxWhere space is available from the browser, so it is not necessary to install the MaxWhere client. A user account is not required either. After loading MaxWhere, we find ourselves in the space immediately. Anyone can open this space without special training. A basic user level of MaxWhere (navigation, use of smartboards) is required.
Entering the space, we see smartboards. On these, we can learn the basics of 3D printing: from the history of 3D printing to the operating principles of today's printers. In the center of the space is a virtual twin of a Creality Ender 3 printer with a simple control panel. We chose this model because it is common, popular and accessible, so anyone working with an actual 3D printer will already be familiar with the device.
After successfully loading the space, you can start printing by following these simple steps:
The space is fully customisable. On the one hand, users with Editor role can modify the content of the smartboards. On the other hand, the operation of the 3D printer can be illustrated by importing any gcode file that was created for the Ender 3 printer.
Every year, hundreds of people from all over the world study at the doctoral school of educational methodology at Johannes Kepler University in Linz. In addition, many workshops and conferences are organised. In this way, the project, with the participation of MaxWhere, can become known to a wide range of doctoral students, which may also indirectly stimulate the creation of many other experience-based learning and simulation projects. The role of virtualisation solutions in education is growing, so it is essential that they are developed with a scientific basis and then validated by experts.
The space serves both public education and science communication purposes. The operation, maintenance and eventual repair of a "real" 3D printer can be expensive, time-consuming, and require knowledge that a teacher with general training does not necessarily have. The price of an entry-level 3D printer and the cost of the materials needed to operate it would be too high for most schools. Furthermore, not all institutions have trained staff to handle an actual 3D printer.
Anyone can open the MaxWhere 3D Printing Workshop space, then bring it into their class and introduce students to the process of 3D printing. Thanks to the virtually printed objects, learning becomes experiential and fun. The space can be made public once the development is complete so anyone can use it.
Learning does not end when the object is printed: students can even create the geometry to be printed, so the whole process unfolds under their hands. An easy and short task can be transforming a hand-drawn 2D contour into a 3D figure with interesting and free software like Tinkercad and Kiri:Moto, then start slicing and printing.
The creation of the 3D printing simulation space led to developments that further expanded the basic capabilities of Maxwhere. The challenges encountered during the simulation of the technology thus represent a much broader development for MaxWhere. It became possible to display the three-dimensional objects formed from the filament during printing in "real-time". Such display capability is also needed to visualise other additive technologies, but material removal can also be modelled similarly.
Tutorial: https://docs.maxwhere.com/usersguide/index.html
Gcode files: https://mw-public-downloads.s3.eu-west-1.amazonaws.com/3D-printing-resources/mw-logo.gcode
https://mw-public-downloads.s3.eu-west-1.amazonaws.com/3D-printing-resources/steamupgrade-logo.gcode

Europe's largest intermodal logistic investment, gateway of the New Silk Road being built between Europe and China, is visualized and made remotely controllable by MaxWhere. The visualization on the MaxWhere platform enables the safe and efficient operation of the logistics terminal, the training of employees, troubleshooting and many other operations. The application of the digital twin serves cost-effectiveness and enables quick intervention and continuous data analysis.
East-West Gate (EWG) is an intermodal (i.e. combining rail and road modes of transport and ensuring the connection between them) terminal in Fényeslitke (Hungary). The purpose of the investment is to relieve the burden on the logistics hubs of the Belarusian-Polish border by connecting east and west, speed up the east-west freight transport, and not least to put Hungary back on the world map of logistics. The terminal will carry out the transshipment required due to the change of railway gauge using the latest technology and will handle up to 1 million 20-foot containers (TEU) per year. This means that the EWG Terminal will be the largest such facility in Europe in terms of its theoretical capacity and area.
This 85-hectare site has been fitted with IoT (Internet of Things) sensors at all necessary points, which send data in real time to MaxWhere's information system. These sensores, as well as the means of transport (freight trains, trucks, cranes, etc.), the transshipment and security equipment, the cameras, and even the movement and status of the employees are visualized and analysed by MaxWhere.
How did MaxWhere become capable of tracking 1,500+ containers, 50+ people, 850 m long railway crane tracks, lots of trucks and semi-trailers, as well as real-time imaging and remote control of an 85ha area?
MaxWhere is known by many people for its exciting 3D spaces and smartboards, but before the well-known user interface, the basic idea was born long before. The central thought was the need of a software allowing the user to manage the communication between industrial systems and the real-time data required for management. The goal of Dr. Péter Baranyi, Dr. Péter Galambos and their colleagues was to make MaxWhere a visual interface that is easy to interpret and is capable for connecting real-time intelligent cyberphysical systems.
They started to deal with this challenge around 2010, at that time purely as a research topic. It is important to mention that at that period the concept of digital twin was not yet in the public mind, but even then the plan was to organize all the data collected from a physical environment into one virtual space, and to display it, enabling easy processing, and helping users to make quick decisions.
What is digital twin?
Science has been studying digital twins since the beginning of the 2000s. A digital twin is a virtual model of a physical space (building, facility, or even a city) or an equipment that represents a physical process. Digital twin is not a simple physical model, but visualizes the operation, which makes it easier to plan the efficiency and safety of the process. The digital twin enables simulations and training, and if the physical space or device is equipped with the appropriate IoT devices, remote control intervention is also possible.
The team achieved its first big success at the Pioneers Industry 4.0 hackathon in Linz (12-14.11.2018 Linz, Austria). In the 48-hour competition the team was given the task of creating a digital twin of a logistics package sorting system. The team implemented the full visualization, including the so-called time-travel analysis function, the visualization of raw PLC data, and the display of real-time video streams, which resulted in their victory.
MaxWhere is based on the natural need of the human brain, i.e. to understand spatial information is more comfortable than the comprehension of abstract 2D data. Operators working with complex information make much fewer mistakes if the data is not displayed and handled in spreadsheets. Users need spatial organization and visual associations for efficient and quick orientation.
With the help of IoT sensors, MaxWhere can display the location of objects, physical properties, process status, metadata, e.g. the current state of an entity.
The knowledge and technology necessary to create a digital twin were already fully available when the demand arose from the EWG management (following the digital development trends and technological needs of the time) to create a functional virtual twin of the entire terminal. The project was a particularly exciting challenge for the MaxWhere team, as the digitization work progressed in parallel with the construction.
Through its virtual twin platform, MaxWhere serves the operation of the EWG Terminal in three major areas:
Let's see these three areas in detail!
The performance of MaxWhere is proven by the fact that it is able to integrate completely independent systems in the virtual twin. MaxWhere acts as an operating system and simultaneously it connects different types of data from many sources:
Thanks to all this features, employing fewer and less qualified operators is sufficient. 3D visualization enables a quick and accurate,error-free overview of the area. As a result, employees can work in a less stressful work environment, which is reflected in HR costs, besides the positive financial consequences of operational efficiency.
The system’s other advantages are:
All of these can be monitored in a virtual/digital twin, with time-synchronized data storage, and MaxWhere also supports the drawing of predictive and/or retrospective conclusions.
With the complete mapping of the EWG area, realistic trainings, e. g. onboarding or safety training can be held in MaxWhere. This solution provides quick and thorough training without burdening or endangering the systems and this solution helps to avoid a good number of workplace accidents.
MaxWhere enables the collection of data that permeate all systems, and based on it, retrospective and predictive data analysis using AI and data mining methods are possible. That is, thanks to data analysis, MaxWhere is able to show development opportunities, possible anomalies, and supports the visual representation of future trends. AI-based retrospective analyses, and prediction are tools for increasing efficiency and quality assurance. The continuous and automated data collection also enables the detailed investigation of emergency cases, which is also a serious cost optimization factor in the long term. The outcome of any legal or insurance case can be predicted using a systematic and detailed monitoring. This can save expenses of up to millions of Euros.
Thanks to the visualization solutions, the efficiency of the EWG terminal will be outstanding: losses resulting from malfunctions can be prevented thanks to quick intervention, and long-term data analysis enables continuous optimization. The project has an outstanding impact on the region's labour market and technological development as well. The EWG presents high tech solutions, which significantly increases the technological development of the region. The terminal creates workplaces where employees can use world-class technologies.
In addition, MaxWhere's visualization and IoT integration solutions enable faster, more efficient work and immediate reaction, even with the help of remote control. Since MaxWhere has a video game-like UI, its use can be entrusted to less qualified employees. In addition, 3D visualization has been proven to be less mentally exhausting, which reduces the number of error possibilities. In addition, real-time visualization enables the information to reach the decision-maker quickly, for the rapid intervention. This ensures safer operation.

Universally available and easy to use 3D virtual platform with a captivating visual world, proven to support the reception and comprehension of virtually shared information, and to improve collaboration.
The official website of MaxWhere Solutions Zrt. and Mistems Ltd.

.jpg)
